| _drawings | ||
| arduino code | ||
| client app | ||
| README.md | ||
project-beverage-vending-machine
A fully automated beverage dispenser, controllable via an Android or Iphone app
It has been designed to hold up to 9 bottles of ingredients for making the cocktails, dispensing the correct amount from each to mix your cocktail of choice.
Cocktails can be chosen using the mobile app (available for iOS and Android) that connects to the machine via Bluetooth. In the app you can also enable/disable ingredients, change the position of each ingredient, edit the recipes and change the amount of each ingredient used in the cocktails and so on.
Getting started
Requirements
- Node.js
- Npm (Node comes with npm)
- Android SDK tools [ installing Cordova requirements ] or Xcode depending on which platform you want to use
- Arduino IDE
Client
- Clone this repository
- From the client app directory, run
npm install - Install Cordova globally
npm install -g cordova - Install Ionic CLI globally
npm install -g ionic@2.2.3 - Run
ionic servein a terminal from theclientdirectory - At this point, Ionic CLI should open the app in your browser
The beverage dispenser
- Clone this repository
- Start the Arduino IDE and open the
_Getraenkeautomat.ino - In Arduino IDE, select your board from the
Tools -> Boardmenu (right now we're not supporting other boards than Arduino Mega) - Select the serial port to which Arduino is connected from the
Tools -> Serial Portmenu - Click the Verify button to see that the code is ok
- Click the Upload button
- If all goes well, that's it
Required Hardware parts
- NEMA 17 stepper motor
- Pololu A4988 stepper driver
- Hitec HS-7955TG servo motor
- Pololu Micro Maestro 6-Channel servo controller
- Bluetooth module HC-05
- GT2 6mm wide timing belt
- GT2 timing pulley 20 teeth 5mm bore
- Timing belt bearing
- 2 x Chrome plated round rail 1200mm x 12mm
- 4 x SK12 12mm bore linear rail shaft support
- 4 x SC12UU aluminium pillow block housing
- 9 x 40ml Beaumont Metrix SL spirit measure
- 3 x Wall 3 bottle rack
- Endstop microswitch
- Arduino Mega 2560
- Cable carrier
- DC-DC converter (12V to 5V)
- AC power supply 12V (6.67A)
List of 3D parts used in this project
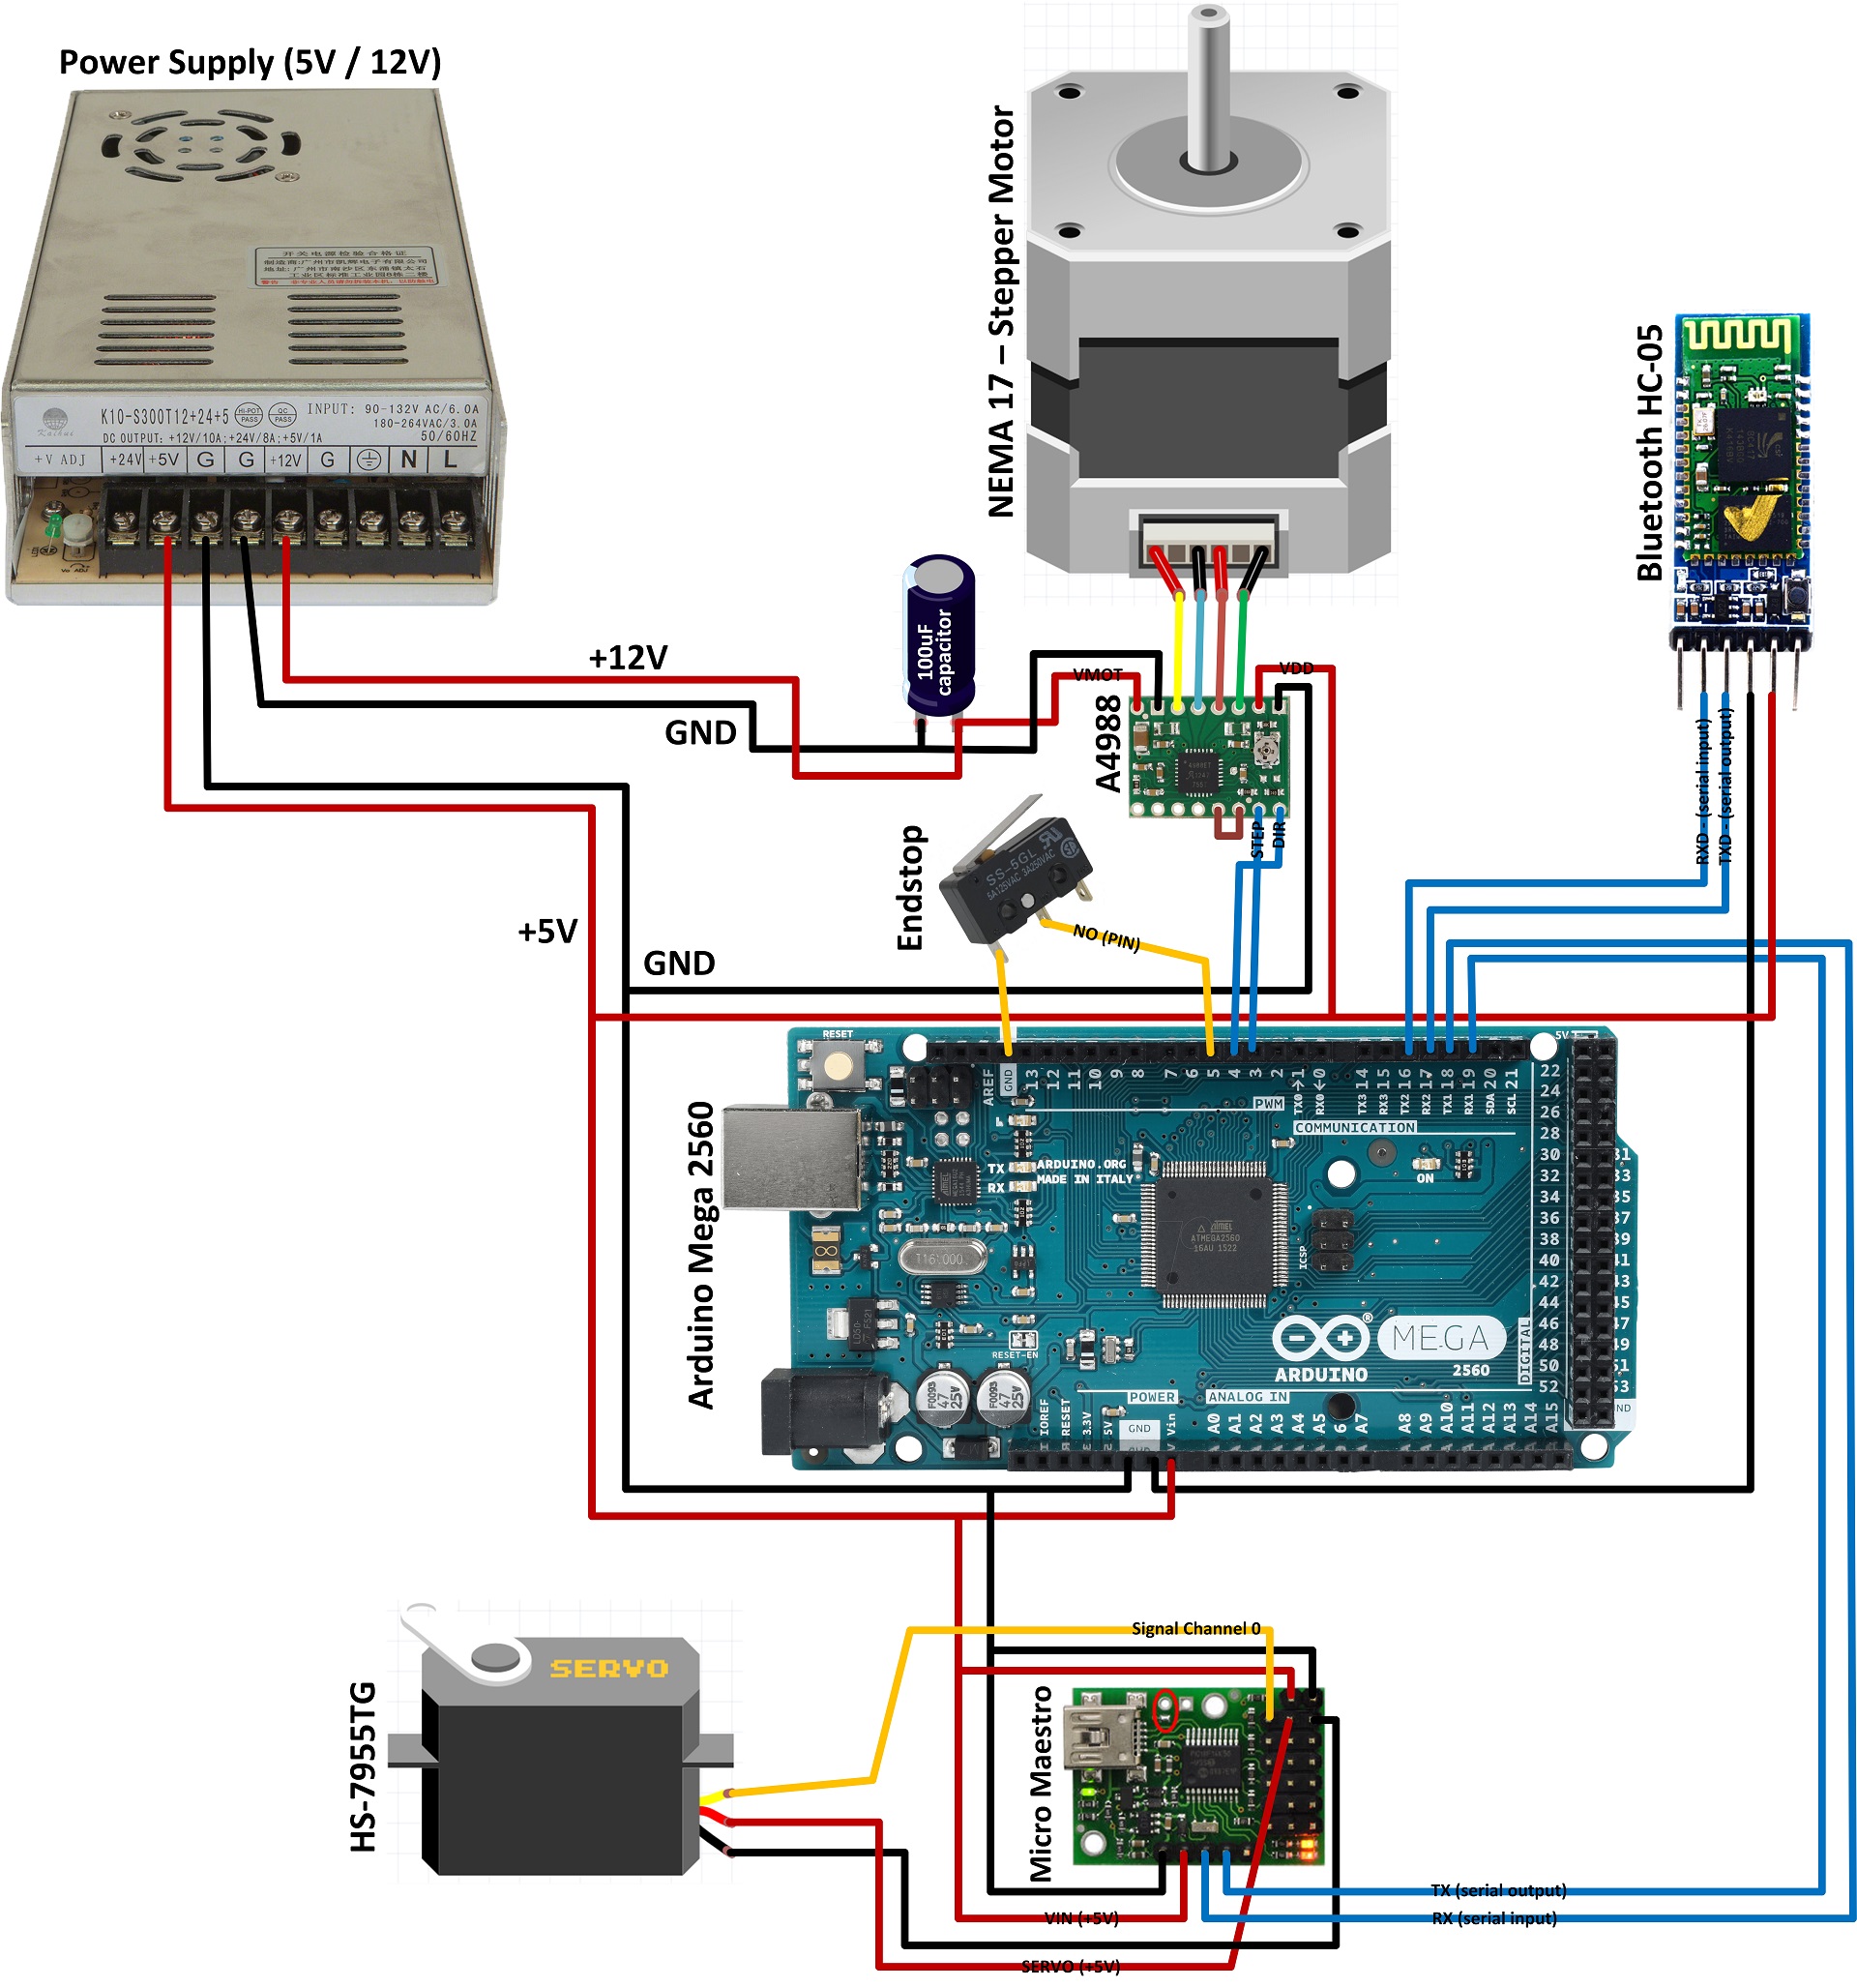
Wiring diagram

Communication
The mobile app and the machine communicates over the Serial port using the Bluetooth module HC-05 (with a few small changes, you can use other methods for communication like USB or WiFi too). See all available communication commands below in the "Available commands" section.
Available commands
Multiple commands can be sent in a single message by separating them with a comma ",". All the commands will be executed one after another in the order in which they're written. The messages must be ended with a newline "\n" character to be run.
Example
X-4995,F2 H2500 W3000,X-1990,F6 H2300 W2300,H
X: Move X axis
Usage
Xnnn
Parameters
Xnnn - The position to move to on the X axis
Example
X-4995 ; Move to -4995 position on the X axis
H: Home X axis
Usage
H
Parameters
This command can be used without any parameters
Example
H ; Home the X axis
F: Pour
Usage
Fnnn Hnnn Wnnn
Parameters
Fnnn - Times to pour
Hnnn - Time duration (in ms) to hold dispenser in open position
Wnnn - Time duration (in ms) to wait till next pour
Example
F2 H2500 W3000 ; Pour two times, hold dispenser open for 2500ms and wait for 3000ms between each pour
Additional information
- Dispensers used in this project won't work with liqueur and other thick drinks. You might also have problems with sugary drinks as they stick inner dispenser parts together if you leave the liquid inside the dispenser for hours
- You can use Coca-Cola and other carbonated drinks with these dispensers, but don't forget to make a hole at the bottom of the bottle before mounting the dispenser to the bottle in order to let air get out, otherwise you will have a big fountain. Use empty bottles and fill them later through the holes after mounting the dispensers
- Wash dispensers very well after every use, otherwise the inner dispenser parts will stick together. I would also recommend you to wash them before every use